1. LCD 기본 사용법 알아보기
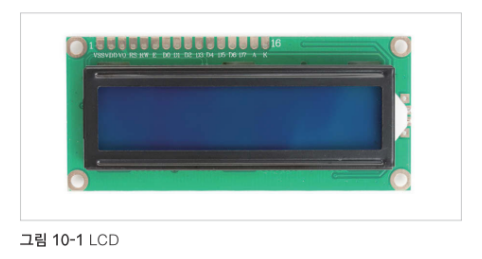
▶ LCD(liquid crystal display)란?
: 뒷면에 빛을 내는 백라이트(backlight)를 배치하고 앞면에 액정을 두어, 전기 신호에 따라 빛을 차단하거나 통과시키는 방식으로 문자나 숫자 등읊 표시하는 장치
- 서킷에서 제공하는 LCD: 1602 LCD --> 가로로 16개의 문자를 출력할 수 있고, 세로로 2줄을 표현할 수 있는 LCD
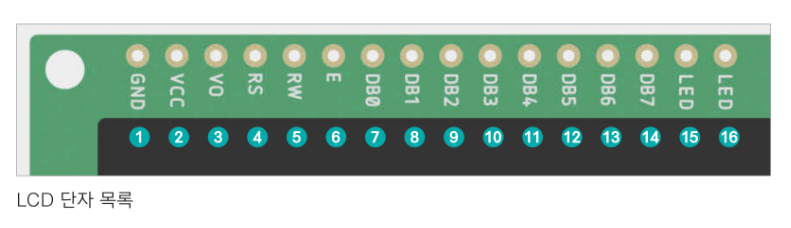
- GND: 접지
- VCC: 전원(5V)
- V0: LCD에 표시되는 문자의 밝기를 제어하는 단자
- RW: LCD의 값을 읽을지 쓸지 결정하는 단자
--> HIGH값으로 설정하면 LCD에 출력된 값을 읽을 수 있고, LOW값으로 설정하면 LCE에 문자를 출력할 수 있다.
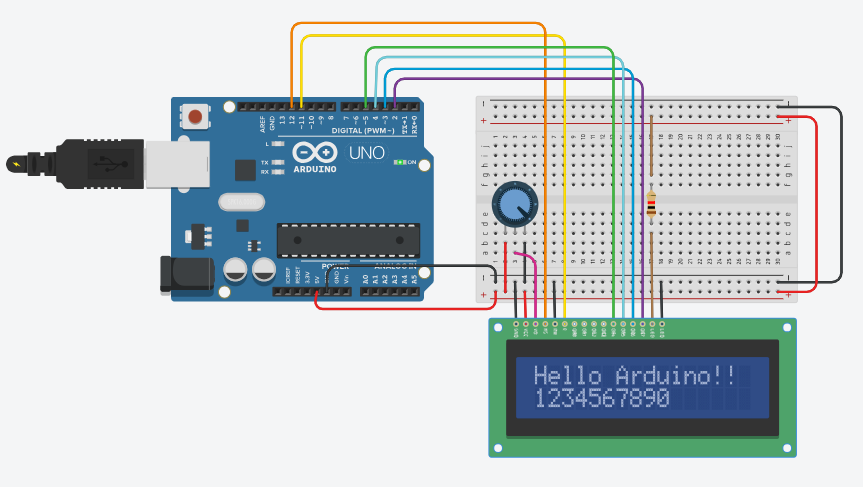
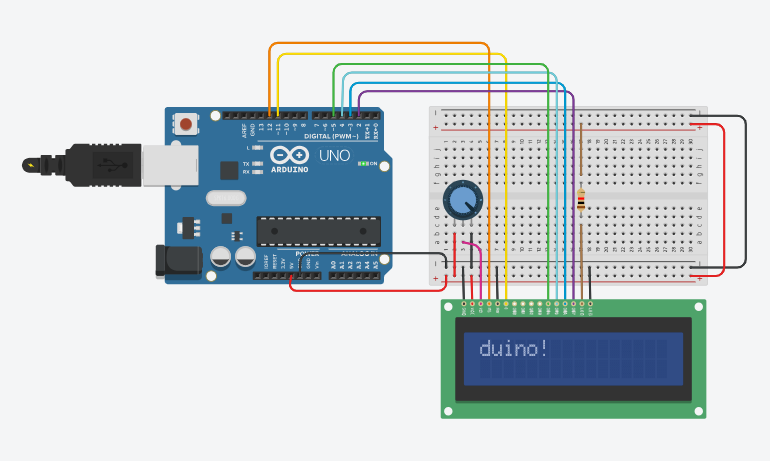
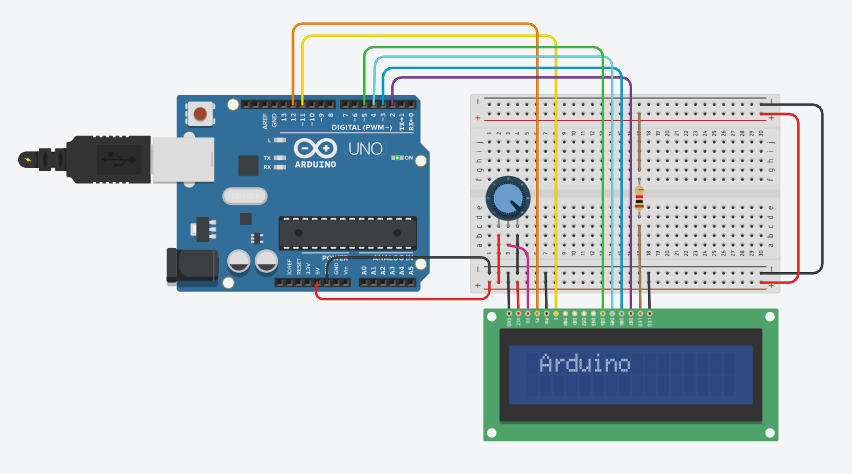
Do it! 실습 10-1. LCD에 지정한 문자열 출력하기
#include <LiquidCrystal.h>

//연결된 아두이노 핀 번호로 LCD 모듈 초기화
LiquidCrystal lcd(12, 11, 5, 4, 3, 2);

void setup(){
  lcd.begin(16, 2);             //1602 LCD 모듈 설정
  lcd.print("Hello Arduino!!"); //문자 출력
}

void loop(){
  lcd.setCursor(0, 1);          //커서 위치 변경
  lcd.print("1234567890");      //숫자 출력
}- #include <LiquidCrystal.h>
- LiquidCrystal lcd(12, 11, 5, 4, 3, 2, 1); 초기화를 해 놓아야 LCD가 아두이노에게 정상적으로 데이터를 받아 작동한다.
▶ void setup()
- lcd.begin(16, 2); 1602 LCD 모듈 설정
- lcd.print("Hello Arduino!!"); 문자 출력
▶ void loop()
- lcd.serCursor(); 커서(LCD 문자 출력을 시작하는 위치)를 변경한다.
매개변수는 0번째 열과 1번째 행을 의미한다. 즉, 커서를 0번째 열 1번째 행으로 이동시킨다. - lcd.print("1234567890"); 출력
▷ 가변저항의 역할?
: 가변저항의 출력 단자에 연결된 V0 단자는 LCD에 나타나는 문자의 밝기를 조절하는데 사용한다. 실제 회로에서 가변저항값에 따라 밝기가 달라지지만, 서킷에서는 LOW값을 줄 때만 액정이 밝아지며 문자가 출력된다.
2. LCD와 다른 구성 요소 조합하기
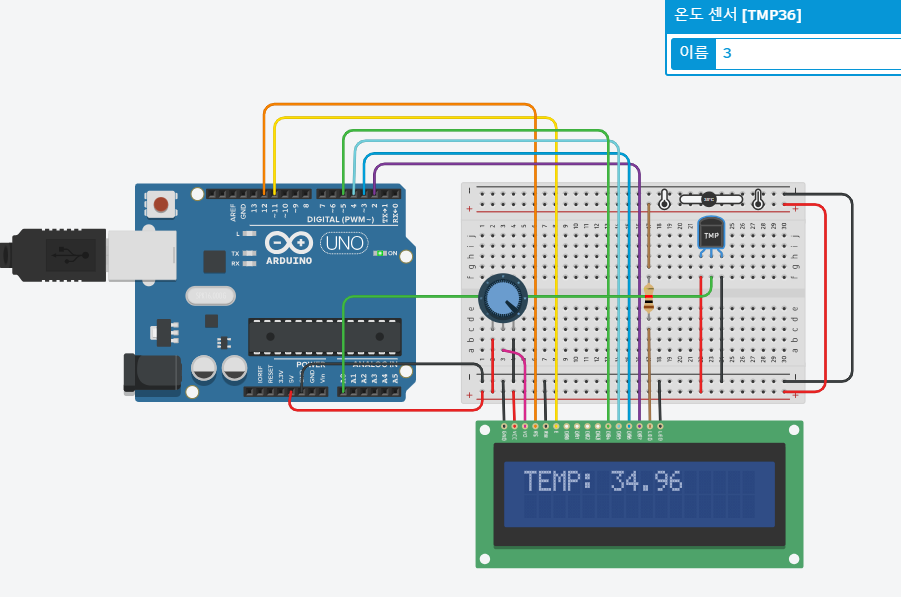
Do it! 실습 10-2. LCD에 온도값 출력하기
#include <LiquidCrystal.h>

//연결된 아두이노 핀 번호로 LCD 모듈 초기화
LiquidCrystal lcd(12, 11, 5, 4, 3,2);

void setup(){
  lcd.begin(16, 2);
  Serial.begin(9600);
}

void loop(){
  int readValue = analogRead(A0);       //온도 센서(TMP36)값 측정
  float voltage = readValue*5.0/1024.0; //전압값 변환
  float temperature = voltage*100-50;   //온도값 변환

  String tempStr = String(temperature); //온도값을 문자열로 변환
  lcd.print("TEMP: " + tempStr);        //LCD에 문자열 출력
  Serial.println(tempStr);              //직렬 모니터에 문자열 출력

  delay(500);
  lcd.clear();  //LCD 초기화
}
Do it! 실습 10-3. LCD에 출력된 문자에 이동 효과 주기
#include <LiquidCrystal.h>

//연결된 아두이노 핀 번호로 LCD 모듈 초기화
LiquidCrystal lcd(12, 11, 5, 4, 3,2);

void setup(){
  lcd.begin(16, 2);
  lcd.print("Hello, Arduino!");
}

void loop(){

  //출력된 문자를 왼쪽으로 16칸(문자열 길이) 이동
  for(int position = 0; position < 16; position++){
    lcd.scrollDisplayLeft();
    delay(150);
  }

  //출력된 문자를 오른쪽으로 32칸(문자열의 길이 + LCD 가로 길이) 이동
  for(int position = 0; position < 32; position++){
    lcd.scrollDisplayRight();
    delay(150);
  }

  //출력된 문자을 왼쪽으로 16칸(문자열의 길이) 이동
  for(int position = 0; position < 16; position++){
    lcd.scrollDisplayLeft();
    delay(150);
  }
}- lcd.scrollDisplayLeft();
- lcd.scrollDisplayRight();
도전: LCD보다 긴 문자열을 출력해 봐요!
#include <LiquidCrystal.h>

// 문자열을 초기화
String str = String("Nice to meet you!! Arduino");

// 아두이노 연결된 핀번호로 LCD모듈 초기화
LiquidCrystal lcd(12, 11, 5, 4, 3, 2);

void setup() {
  lcd.begin(16, 2);		// 1062 LCD모듈 설정
  lcd.print(str);		// 문자 출력
}

void loop() {

  // 문자열의 길이를 가져와 변수에 저장
  int length = str.length();

  // 출력된 문자를 왼쪽으로 (문자길이 - LCD의 가로길이)만큼 이동
  for(int position=0; position<length-16; position++) {
    lcd.scrollDisplayLeft();
    delay(150);
  }

  // 출력된 문자를 오른쪽으로 문자의 길이만큼 이동
  for(int position=0; position<length; position++) {
    lcd.scrollDisplayRight();
    delay(150);
  }

  // 출력된 문자를 왼쪽으로 문자의 길이만큼 이동
  for(int position=0; position<length; position++) {
    lcd.scrollDisplayLeft();
    delay(150);
  }
}
'아두이노' 카테고리의 다른 글
| [Do it! 아두이노] 11. 7세그먼트로 숫자 표시하기 (2) | 2023.08.20 |
|---|---|
| [Do it! 아두이노] 9. 함수와 라이브러리 활용하기 (0) | 2023.08.20 |
| [Do it! 아두이노] 8. 아두이노 출력으로 아두이노 작동하기 (1) | 2023.08.19 |
| [Do it! 아두이노] 7. 아날로그 입력으로 아두이노 작동하기 (0) | 2023.08.19 |
| [Do it! 아두이노] 6. 디지털 입력으로 아두이노 작동하기 (0) | 2023.08.19 |


